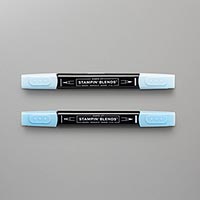
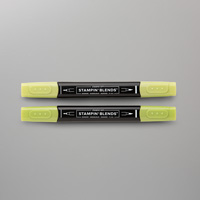
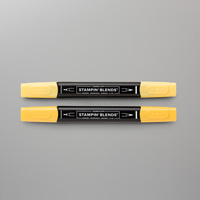
Friday, March 20, 2020

Sneak Peak 2 - Ornate Garden


Exciting news from Stampin' Up!  For the first time ever, one of the new Product Suites from the upcoming 2020-2021 Annual Catalog will be released early!!  I was able to get my hands on these amazing products already and I am so excited to share with you some of the fun creations I've come up with - a true Sneak Peak!

The Ornate Garden Suite will be available to customers beginning April 1 - and that's no joke!!!


Yesterday I brought you a Thank You card - today I chose to make a card celebrating friendship!


Instructions:
  1. Cut a base of Mossy Meadow at 8.5" x 5.5", scored and folded at 4.25" on the long side.  Use your bone folder to burnish the fold
  2. Cut another piece of Mossy Meadow, this time to 4" x 5.25" - emboss with the Ornate Floral 3D Embossing Folder.  
  3. Using the die with daisies from the Ornate Borders dies, cut a piece of Champagne Foil
  4. From the Ornate Garden Specialty DSP, cut a 4" x 5.25" piece of the yellow pattern with Terracotta Tile flowers
  5. Using the same die from step 3, cut this DSP on an angle
  6. Adhere the cut DSP to the embossed piece of Mossy Meadow
  7. Adhere the Champagne Foil border to the piece of embossed Mossy Meadow, lining it up in the places where the DSP was cut using the same die - your foil strip will hang over the edges - trim this excess foil paper
  8. Adhere this completed piece to the card front, centered
  9. Using the smallest frame from the Ornate Borders dies, cut a piece of Very Vanilla
  10. Put this Very Vanilla piece into your Stamparatus and secure with a magnet
  11. From the Beautiful Bouquet stamp set, choose the sentiment "I couldn't have picked a better friend than you" and stamp it centered on the piece of Very Vanilla - it will fit perfectly and your Stamparatus will help ensure that you stamp right where you want to
  12. Use Stampin' Dimensionals to adhere your sentiment to the card front
  13. Cut 3 of each of the flowers from the Ornate Borders dies in Terracotta Tile
  14. Use your Stampin' Pierce Mat and the stylus end of the Take Your Pick tool to give your flowers some dimension.  Do this to all but two of the smallest flower
  15. Glue the two smallest flowers that are still flat to the sentiment panel
  16. Layer the remaining flowers in groups of two on top of the Champagne Foil border - this gives a beautiful contrast and all adds some depth to your card 


If you purchase $150 or more, take advantage of the Hostess Rewards for yourself!  If you purchase less, please use this Hostess Code: RDFBQXNE. I will pick a random customer at the end of the month from all orders that use this code to receive the Hostess Rewards - it could be you!!

Today's Colors:

Products Used:

Thursday, March 19, 2020

Sneak Peak - Ornate Garden

Exciting news from Stampin' Up!  For the first time ever, one of the new Product Suites from the upcoming 2020-2021 Annual Catalog will be released early!!  I was able to get my hands on these amazing products already and I am so excited to share with you some of the fun creations I've come up with - a true Sneak Peak!

The Ornate Garden Suite will be available to customers beginning April 1 - and that's no joke!!!


This suite features 2 stamp sets - one with beautiful floral images and the other with sentiments of gratitude.  It also has 2 coordinating die sets with beautiful, ornate patterns!  Not to mention the ribbons, paper and embellishments!  Oh, you're going to love this!

Today I focused on gratitude, and went for a style much different than what you normally see from me.  Here's a close up:

Instructions:
  1. Start with a base of Terracotta Tile cut to 8.5" x 5.5", scored on the long side at 4.25" and burnished with your bone folder along the fold
  2. Cut a piece of Early Espresso to 4" x 5.25" - die cut one 4" side using the loopy edge die from the new Ornate Borders Die
  3. Cut a piece of the Mint Macaron and Gold Foil DSP from the Ornate Garden Specialty DSP to 4" x 4.75" and adhere it to the Early Espresso
  4. Adhere these two pieces to your Terracotta Tile base, angling them so that 3 corners touch the edge of the base, as pictured below
  5. Cut a piece of Whisper White to 4" x 4.5" - emboss with the new Ornate Floral 3D Embossing Folder
  6. Adhere this over the DSP/Early Espresso layer, offsetting the opposite direction
  7. Cut a piece of Early Espresso to 4" x 3/4" - use the long ornate center die from the Ornate Layers dies.  Round the corners using the Detailed Trio Punch and adhere to your card front.  Line this up straight with the edge of the card, not with either offset layer
  8. Stamp "THANKS" from Ornate Thanks onto a piece of 3" x 3/4" Mint Macaron using Versamark
  9. Add Gold Stampin' Emboss Powder and heatset
  10. Use the Banner Triple Punch to create a banner indent on the "T" side
  11. Cut a piece of Early Espresso to 3.25" x 7/8" and use the Banner Triple Punch on one end
  12. Layer your Mint Macaron sentiment onto the Early Espresso Banner and adhere the two to your card front aligned with your floral piece of Early Espresso
  13. Run a strip of Tear & Tape along the side of the floral piece of Early Espresso, starting at the base of the "THANKS" banner and going to the end of the straight side
  14. Use the Terracotta Tile ribbon from the Ornate Garden Ribbon Combo and twist it back and forth as you adhere it to the Tear & Tape, creating the wavy look shown below.  I had never done this before, and I had to lift the ribbon a few times, but it was relatively simple and I love the look it created
  15. On a scrap of Mint Macaron, stamp "ever so much" from Ornate Thanks.  Emboss and heatset with Gold Stampin' Emboss Powder like we did with the "THANKS"
  16. Punch with the Classic Label Punch and adhere to your card front using Mini Stampin' Dimensionals


If you purchase $150 or more, take advantage of the Hostess Rewards for yourself!  If you purchase less, please use this Hostess Code: RDFBQXNE. I will pick a random customer at the end of the month from all orders that use this code to receive the Hostess Rewards - it could be you!!

Today's Featured Colors:


Products used:

Wednesday, March 18, 2020

InKing Royalty March Blog Hop - Easter


Welcome to InKing Royalty's March Blog Hop! During this year's blog hops, we are enjoying a year of celebrations. Hop, hop! This month's projects celebrate Easter, so prepare yourself for a variety of gorgeous, Easter-themed projects. We are excited to share our creations with you today! After you read my post, I hope you'll hop over to the next person on the list at the base of this post.

I don't have any cute little bunny or Easter egg stamps, but that didn't stop me - I think it actually enhanced my creativity, having to design something out of the box.  And boy did I ever have fun!

I chose two of the Sale-a-Bration papers from the 2nd release - they are so versatile!  You'll want to place an order so you can get one or both of these Level 1 products.

Here's how it's made:
  1. Start with a base of Thick Whisper White cut to 8.5" x 5.5", scored on the long side at 4.25" and burnished with your bone folder along the fold
  2. Cut a piece of Purple Posy So Very Vellum Specialty DSP (available as a Level 1 SAB reward) to 4" x 5.25"
  3. Squeeze a generous amount of Multipurpose Liquid Glue onto your Silicone Craft Sheet.  Use a wedge from a Stampin' Sponge to pick up some glue and spread it onto the back of the vellum in a thin, even layer over the entire surface - this is the best way to adhere vellum without seeing your adhesive!
  4. Use the Largest scalloped rectangle from the Stitched So Sweetly die set to cut a piece of the Flowering Foils DSP (available as a Level 1 SAB reward) - I chose the design with the small gold and silver flowers that look like daisies
  5. Using the sponging method I described here, sponge on Pear Pizzazz over your die cut piece of DSP.  After applying the ink, I recommend "buffing" the foil with a piece of paper towel so that the foil really shines
  6. Cut a piece of Pear Pizazz cardstock using the same die used in step 4
  7. Adhere this inked piece of DSP to the cardstock using Multipurpose Liquid Glue - this gives the DSP enough sturdiness to adhere it to the Purple Posy vellum using Stampin' Dimensionals.  Place it slightly higher and to the left of center, as pictured above
  8. Fussy cut a set of two flowers from the sheet of DSP and sponge them with Blushing Bride - set aside
  9. Place a piece of Blushing Bride cardstock into your Stamparatus and stamp the sentiment "Happy Easter, Happy Spring, happy, happy everything" from Timeless Tulips in Melon Mambo
  10. Clean the ink from your stamp, but do not remove it from the Stamparatus
  11. Ink the stamp with Versamark and stamp over the Melon Mambo sentiment you just stamped
  12. Apply Clear Stampin' Emboss Powder and heatset - this gives the appearance and feel of pink heat embossing - the shine looks amazing with the shiny foiled DSP 
  13. Use the scalloped label die from Stitched So Sweetly to cut out your sentiment - I suggest centering the best you can, as we are going to add elements to both sides
  14. Put a Stampin' Dimensional under the right side of the sentiment and use Multipurpose Liquid Glue on the rest - adhere to the front of your card with the liquid glue on the Pear Pizzazz and the Stampin' Dimensional on the vellum
  15. Glue the two Blushing Bride flowers that you inked earlier to the right side of the sentiment
  16. Cut a length of Whisper White Polka Dot Tulle to about 4-5 inches.  I had dyed my tulle using water and Pretty Peacock previously, I didn't let it soak long so the color came out as a beautiful light blue, perfect for Spring/Easter!
  17. Tie a knot in the center of your Tulle, don't pull it too tight, seeing the knot is part of the appeal
  18. Trim the ends to angles - following the three polka dots works perfectly for this
  19. Use a Mini Glue Dot to adhere this piece of Tulle to the left of your sentiment

Here is a closer view of the embossed sentiment:


Thank you for stopping by today.  I hope you'll hop along to the next stop on the blog hopSusan Fields at Very Simply Susan


Thank you for hopping along with us. If you get stuck during the Blog Hop, please use this line-up as a guide:
  1. Brian King at Stamp with Brian
  2. Candy Ford at Stamp Candy
  3. Joanne Brown at Stamping with JoJo
  4. Susan Fields at Very Simply Susan
  5. Sue Jackson at Just Peachy Stamping
  6. Shawn de Oliveira at Shawn Stamps
  7. Lynn Kolcun at Avery's Owlery
  8. Jennifer Spiller at Westside Paper Creations
  9. Jackie Beers at Blue Line Stamping
  10. Ann Murray at Murray Stamps Ink
  11. Pam Morris at Tap Tap Stamp
  12. Julie DiMatteo at The Paper Pixie

Today's Featured Colors:


Products used:

Monday, March 16, 2020

Bird Ballad Thank You

I would like to thank my Upline, Candy Ford, for featuring my card on her blog today!!! If you didn’t come here from Candy’s page, please go check it out - she posts amazing projects!!

In today's society of electronic-everything, Thank You notes seem to be overlooked more and more.  Here is a beautiful Thank You that is surprisingly simple to make, and will be very much appreciated!

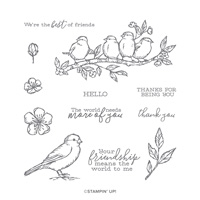
Begin with a scrap of Whisper White cardstock.  Stamp the image of the birds on a tree from the Free As A Bird stamp set using Memento Tuxedo Black Ink.  Stamp the "thank you" sentiment under the branch.  It is important to use the Memento Ink because we will be coloring with Stampin' Blends, and if you use an alcohol-based ink to stamp your image, the lines will become blurry when you color.

Use your Stampin' Blends to color the image, also highlighting the words "thank you".

Now cut the image using the 3rd largest circle from the Layering Circles Dies.  Additionally, cut a piece of Balmy Blue cardstock using the 2nd largest scalloped circle in the Layering Circles Dies.  Adhere your colored panel of Whisper White to the Balmy Blue.

Create a base for your card using a piece of Balmy Blue cut to 8.5" x 5.5", scored at 4.25" on the long side.  Burnish well with your bone folder.

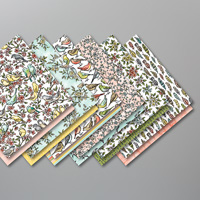
Choose 2 patterns from the Bird Ballad Designer Series Paper and cut one to 4" x 2" and the other to 4" x 3".  Adhere the DSP panels to the front of your card base, placing the smaller piece on the top of the card.

Using Stampin' Dimensionals, adhere the scalloped Balmy Blue circle to the card, lining the visible line of Balmy Blue up approximately in the middle of your circle.

As a final touch, you can include a double-bow made of Whisper White Solid Baker's Twine if you wish to add a little more interest to the card.

Friday, March 13, 2020

Vintage Bouquet

Today is Friday the 13th - what's your most nightmare-ish crafting story?  Mine involves today's card!

I was in the midst of making this card for a challenge when our power went out due to a storm.  I had no idea when the power would come back on and the finished card had to be posted by a certain time, so I got out my tripod flashlight and continued to work.  Fortunately, all the stamping and inking had been done before power went out, so all I had left was the embossing, die-cutting and assembly of the card.  Not too shabby for working in the dark, right?


Here's how it was made:
  1. Start with a base of Crumb Cake cut to 8.5" x 5.5", scored on the long side at 4.25" and burnished with your bone folder along the fold
  2. Cut a piece of Whisper White to 5.5" x 4" - die cut using the Stitched Lace background die
  3. Using a piece of sponge cut as shown in my previous post, ink this die-cut piece using Gray Granite
  4. Adhere this to the Crumb Cake base using Multipurpose Liquid Glue
  5. Cut a piece of Whisper White to 3.5" x 4.5" and emboss using the Scripty 3D Embossing Folder - set aside
  6. Cut a piece of Whisper White to 4" x 5" and die cut using the oval from the Heirloom Frames Dies
  7. Emboss your die cut piece using the oval from the Heirloom Frames 3D Embossing Folder
  8. Lightly sponge the raised areas of your embossed frame with the Gray Granite sponge, don't press hard, you only want the ink on the raised pieces, you don't want a fully Gray Granite frame
  9. Adhere the piece of Whisper White that you embossed with Scripty to the back side of your oval frame using Stampin' Dimensionals - there will be overhang because you are adhering a rectangle to an oval, use your Paper Snips to trim the piece of Scripty-embossed paper so the overhang is not visible
  10. Adhere these two pieces to the Stitched Lace background - Snail Tape or Tear & Tape will be the easiest for this
  11. Using Whisper White paper, stamp in Mint Macaron stamp the large rose, several leaves and several of the branches.  Die cut these using the Frosted Bouquet Dies and set aside
  12. Using Whisper White paper, stamp in Soft Suede about 4 of the smaller roses and die cut them using the Frosted Bouquet Dies
  13. Using Whisper White paper, stamp in Gray Granite about 4 of the thistles and die cut them using the Frosted Bouquet Dies
  14. Adhere your bouquet pieces to the Heirloom Frame using Multipurpose Liquid Glue - I did not glue pieces down to the Scripty-embossed center because I wanted them to be raised, you can put some Mini Dimensionals behind them if you feel that they need to be secured in some fashion
  15. Lastly, add some Pearl Basic Jewels - I added 7, 4 to the small Soft Suede roses, 2 on the frame and one on the background - place them where ever you see fit
Today's colors:

If you purchase $150 or more, take advantage of the Hostess Rewards for yourself!  If you purchase less, please use this Hostess Code: RDFBQXNE. I will pick a random customer at the end of the month from all orders that use this code to receive the Hostess Rewards - it could be you!!

Products used today:

Thursday, March 12, 2020

Daisy Lane - Friend

Today's dainty and beautiful card is much more simple than it looks - I love cards that are full of detail, yet still east to put together!


Here's how to make it:
  1. Start with a base of Crumb Cake cut to 8.5" x 5.5", scored on the long side at 4.25" and burnished with your bone folder along the fold
  2. Cut a mat of Early Espresso to 5.25" x 4" and adhere to your card base
  3. Cut a piece of Petal Pink to 5 1/8" x 3 7/8" - emboss using the Pinewood Planks 3D Embossing Folder, adhere to the Early Espresso mat
  4. Cut a strip of Crumb Cake to 1" x 3 7/8" - stamp the word "Friend" from Daisy Delight in Crumb Cake, aligning as far to the left of the strip as you can - so as to leave enough room for the completed flower
  5. Cut a 4" piece of Very Vanilla Scalloped Lace Trim, use Tear & Tape to adhere this to the back of the Crumb Cake Strip
  6. Adhere the Crumb Cake Strip and Lace trip to the embossed Petal Pink panel
  7. Using a scrap of Petal Pink, stamp 2 of the leaf clusters from Daisy Delight in Granny Apple Green and punch them using the Leaf Punch, set aside
  8. On another scrap of Petal Pink, stamp two if the large daisies in Crumb Cake and punch them using the Large Daisy Punch
  9. Place each petal individually between your thumb and bone folder and roll toward you as you pull gently but firmly along the petal - this creates a 3-D effect and makes the Daisy look more realistic
  10. Using a scrap of Petal Pink vellum from the Perennial Essence 12" x 12" Vellum Cardstock pack, stamp the medium daisy/  Heatset this and then punch using the Medium Daisy Punch
  11. On a scrap of Early Espressp, stamp the center of the daisy using Versamark Ink. 
  12. Apply Gold Stampin' Emboss Powder to the Versamark and heatset.  Fussy cut the flower center
  13. Using Stampin Dimensional, adhere the two large daisies to one another, offsetting the petals
  14. Use a Mini Stampin Dimensional to adhere the medium daisy to the two large daisies 
  15. Use a Mini Glue Dot to adhere the gold flower center to the medium Daisy 
  16. Tie a small bow using the Linen Thread and adhere to the center of the Daisy using a Mini Glue Dot
  17. Place your flower there you want it on the card.  Add a small amount of Multipurpose Liquid Glue to the bottom of one leaf cluster and carefully slide it under the flower in a position that looks good to you. Repeat for the second leaf cluster.
  18. Use the Multipurpose Liquid Glue to adhere the Daisy to the card
  19. Add three Pearl Basic Jewels randomly around the Daisy

Today's Colors:


If you purchase $150 or more, take advantage of the Hostess Rewards for yourself!  If you purchase less, please use this Hostess Code: RDFBQXNE. I will pick a random customer at the end of the month from all orders that use this code to receive the Hostess Rewards - it could be you!!


Here are all the products used in today's project:


Wednesday, March 11, 2020

Beautiful Promenade - I’m Here For You

Today's post is full of delightful texture and layers!  Watercolor paper, shimmery texture paste, die cuts, vellum, metallic thread, it keeps going!!


Here's what I did:
  1. I began with a base of Blackberry Bliss, cut to 8.5" x 5.5", scored on the long side at 4.25" and burnished with your bone folder along the fold
  2. Next I added a layer of Balmy Blue measuring 5.25" x 4"
  3. I took a piece of Fluid 100 Watercolor Paper and trimmed it to 5" x 3.75"
  4. I then took an Aqua Painter filled with water, brush wet, and wet the paper where I wanted to apply color
  5. I placed ONE drop of Smoky Slate ink refill on an acrylic block and dipped my Aqua Painter into it.  The I took my colored Aqua Painter and washed over the wet area of my card again - because the paper was already wet, the fluid glides and spreads evenly and beautifully
  6. I dried the paper with my Heat Tool (you could wait for it to dry naturally if desired, but it MUST be dry before moving on)
  7. I placed flourish-y mask from the Basic Pattern Decorative Masks over my cardstock and applied Shimmery White Embossing Paste over the area that was been watercolor-washed.  This needs to dry completely before adhering anything else, I set it aside to dry while I worked on building the pieces of my focal point
  8. Using a piece of Whisper White, I stamped the outline and inside of the flower from Beautiful Promenade in Rich Razzleberry.  I then cleaned the stamps and stamped again with Versamark, pressing only lightly so that not all of the design would be covered in embossing powder
  9. I applied Silver Stampin' Emboss Powder and heat set it, giving a fun metallic look over the beautiful Rich Razzleberry flower, I die cut this using the Beautiful Layers die set
  10. I then cut two sets of leaves from the Flourish die set using Shimmer White Paper 
  11. I also cut two flourishes in Silver Foil paper from the Parisian Dies
  12. Using Vellum, I punched a Starburst and adhered loops of Silver Metallic Thread - I wasn't worried about seeing the adhesive as I knew I would be covering this with the flower made in steps 8 & 9
  13. By this time, my Shimmery White Embossing Paste had dried, so I adhered the panel of watercolor paper to the Balmy Blue mat on the card base
  14. I arranged my leaves, flourishes and starburst vellum as pictured, then picked up the vellum and carefully adhered the center-most points of the leaves and flourishes using Multipurpose Liquid glue
  15. Next, I used 2 Mini Glue Dots to adhere the vellum circle to the leaves & flourishes, being careful to place those glue dots toward the bottom of the starburst, where they would be covered by the flower
  16. I adhered my flower using Stampin' Dimensionals
  17. I took a scrap of Balmy Blue and stamped the sentiment "I'm here for you" from Beautiful Promenade, masking over the comma and "friend" because the sentiment was going to be too long - I used Versamark to stamp
  18. I applied White Stampin' Emboss Powder and heat set, then cut the sentiment using the Classic Label punch.
  19. I used two Mini Stampin' Dimensionals on the right and middle of my sentiment, and a dot of Multipurpose Liquid Glue on the left - because the left side was over the flower that was already raised, I didn't want to raise the sentiment even further
Today’s Featured Colors:


If you purchase $150 or more, take advantage of the Hostess Rewards for yourself!  If you purchase less, please use this Hostess Code: RDFBQXNE. I will pick a random customer at the end of the month from all orders that use this code to receive the Hostess Rewards - it could be you!!


Links to the products used today:

Tuesday, March 10, 2020

Sailing Home Birthday Card

Have you ever wished your Significant Other would participate in making a card with you?  I have - and my wish came true!  I signed us up for a swap called "Guys Make the Card - Birthday", so David got to make a card!

He started the process by choosing a stamp set - he picked Sailing Home because he liked the lighthouse.  Then we went on Pinterest and he found a layout that he liked by fellow SU! Demonstrator Carolyn King.

Here's what he did:
  1. David made a base of Night of Navy by cutting to 8.5" x 5.5" and scoring on the long side at 4.25" - he burnished the folded score line using a bone folder
  2. Next he added a layer of Crumb Cake that measured 5.25" x 4"
  3. On top of the crumb cake he added two panels of 1" x 5" Night of Navy layered with .75" x 4.75" lighthouse print from the Come Sail Away DSP
  4. Over those panels, he added a horizontal piece of 2" x 4" Night of Navy covered by 1.75" x 4" of the blue and white striped pattern from the Come Sale Away DSP (this is actually on the reverse side of the lighthouse pattern used in step 3)
  5. David used the middle-sized Stitched Rectangle die to cut a panel of Whisper White.  On this he stamped the image of the lighthouse and the flying seagulls from Sailing Home in Night of Navy - he was amazed by how easy the Stamparatus made this process!

  6. David double-matted his stamped image on a 3.75" x 2.5" piece of Crumb Cake and 3 7/8" x 2 5/8" piece of Night of Navy.  No lies here, figuring out the dimensions for the mats was the most difficult part of this card
  7. He adhered this double-matted panel to the front of the card
  8. Next, David stamped and cut the Happy Birthday sentiment from Itty Bitty Greetings onto a scrap of Balmy Blue and die-cut it using the banner from the Smooth Sailing dies.  This was adhered to the card front using Stampin' Dimensionals
  9. Using  scrap of Whisper White, David stamped the image of the anchor from Sailing Home and die cut it using the Smooth Sailing dies.  He then used the Night of Navy Twine from the Country Club Twine Combo Pack to put through the hole in the top of the anchor
  10. David then die cut some seaweed in vellum and the rope in Crumb cake, both dies also from the Smooth Sailing Dies
  11. The seaweed was adhered using a small dot of Multipurpose Liquid Glue and placed slightly behind the Happy Birthday banner.  The anchor and rope were both adheres using Mini Stampin' Dimensionals
David's Finished Card

I was so excited when David finished this project and told me that he'd do another one if there was a similar "Guys Make the Card" swap in the future!  Didn't he do a fabulous job? #DudesStampToo

Today's Color Combo


If you purchase $150 or more, take advantage of the Hostess Rewards for yourself!  If you purchase less, please use this Hostess Code: RDFBQXNE. I will pick a random customer at the end of the month from all orders that use this code to receive the Hostess Rewards - it could be you!!


Monday, March 9, 2020

Candy Hearts Blog Hop - Spring Theme


Welcome to the first ever Candy Hearts Blog Hop! Today we are sharing Spring themed projects. After reading my post, I hope you will hop to the next person on the list below. Be sure to check out ALL the great projects the Hearts have created for you today.

I am so excited to be participating in the very first Candy Hearts Blog Hop!  Our theme for this month is "Spring" - we're all ready for spring to be sprung, aren't we?


Here's how it's made:
  1. Create the base of the card using Whisper White Thick Cardstock, cut to 8.5" x 5.5" and scored at 4.25" on the long side. Fold along the score line and burnish with your bone folder
  2. I used regular Whisper White for the focal point, but I am very light-handed with watercolors so it worked out.  I'd recommend in hindsight using watercolor paper or the Shimmery white paper. Whichever paper you choose, stamp the image of the 4 birds on a branch from Free As A Bird using versamark ink
  3. Apply Gold Stampin' Emboss Powder over your stamped image.  Heatset.
  4. Next, water color the image using an Aqua Painter.  On a large acrylic block, I applied ONE drop of reinker each of Soft Suede, Pool Party, Mossy Meadow, and Petal Pink.  I also scribbled some Daffodil Delight onto the block using a Stampin' Write marker (I did this because so little Daffodil Delight is used that I knew I didn't need a whole drop of reinker).
  5. IGently squeeze your Aqua Painter to wet the bristles, then dab it off on a paper towel before dipping the Aqua Painter into the first color of reinker - I started with Petal Pink because I wanted to freehand the birds' bellies before adding any blue to their bodies.
  6. In between each color, squeeze out more water onto the bristles and paint off the color on your paper towel
  7. I let the Petal Pink dry while painting in the branch (Soft Suede), leaves (Mossy Meadow) and flowers & bird beaks (Daffodil Delight)
  8. Finally, I came back and painted the Pool Party for the bodies of the birds.  I gently blended into the pink bellies some, so that they didn't look perfectly round and unnatural.
  9. Set the focal piece aside and let it dry completely while working on other elements of the card
  10. Cut a piece of Gold Foil Paper to 5 3/8" x 4 1/8" - adhere to card base
  11. Cut a piece of the floral pattern from the Bird Ballad DSP to 5 1/4" x 4" - adhere to the Gold Foil paper
  12. Using the largest die from Stitched Nested Labels, cut a piece of Pool Party
  13. Cut two of the leafy branches from Botanical Tags dies  in Mossy Meadow
  14. Cut 4 of the small open leaf clusters from the Wild Rose dies in Pear Pizzazz
  15. Cut two of the twiggy branches from the Frosted Bouquet dies in Soft Suede
  16. Use a Q-Tip to put some Versamark ink on the "balls" of each twig - cover in White Stampin' Emboss Powder and heatset
  17. Arrange 1 leafy branch, 2 open leaf clusters and 1 twiggy branch at the top left and bottom right of your Pool Party Stitched Nested Label, adhere to the DSP
  18. Now that your focal point is completely dry, cut it out using the 2nd largest Stitched Nested Label
  19. Using Soft Suede, stamp the sentient “a little note” from Butterfly Gala in the bottom right area of the focal Stitched Nested Label
  20. Adhere the focal Stitched Nested Label to the Pool Party Stitched Nested Label
  21. As a final touch, I added a small bow made of Petal Pink Metallic Edged Ribbon to the upper right side of the Stitched Nested Labels
Don't you just FEEL that spring is in the air when you see this card?

Thank you for hopping with the Hearts today! Be sure to hop around to all the stops. You do not want to miss any of the creativity in this talented group of stampers!
  1. Candy Ford of Stamp Candy
  2. Joanne Brown of Stamping With JoJo (you are here)
  3. Linda Krueger of The Stamp Coach

Today’s featured colors:

If you purchase $150 or more, take advantage of the Hostess Rewards for yourself!  If you purchase less, please use this Hostess Code: RDFBQXNE. I will pick a random customer at the end of the month from all orders that use this code to receive the Hostess Rewards - it could be you!!

Here are the products that were used for today’s project:

Friday, March 6, 2020

Purple Daisy Birthday Card

Today I am bringing you a lovely birthday card in soft colors.


Here's what I did:

  1. Start with a base of Purple Posy cut to 8.5" x 5.5", scored on the long side at 4.25" and burnished with your bone folder along the fold
  2. Cut a mat of whisper white that measures 4" x 5.25" don't glue it down just yet
  3. Cut a piece of Soft Sea Foam to 3 7/8" x 5 1/8" and emboss with the Scripty 3D Embossing Folder and adhere it to the Whisper White mat
  4. Use the 2nd largest die from the Stitched Nested Labels Dies to cut a piece of Whisper White
  5. Stamp "Happy Birthday" from Peaceful Moments toward the bottom right of the label using Highland Heather ink
  6. Punch 4 daisies out of Purple Posy cardstock using the Medium Daisy punch
  7. Adhere 2 daisies together, with the petals alternating so all show.  Do this a 2nd time to create two 3D daisies.
  8. Place the stamped label and the 2 daisies onto the card where you desire them, part of the label will overhand the edge of the mat.  Use Multipurpose Liquid Glue to adhere the label to the mat - don't adhere the daisies yet.
  9. Use your paper trimmer to remove the over-hanging part of the label, then adhere the whole mat to the card base
  10. Cut out 3 leaves from the Poppy Moments dies using scraps of Pear Pizzazz and Soft Seafoam - adhere the layers using Multipurpose Liquid Glue
  11. Place your leaves and daisies as desired on the card front - use Multipurpose Liquid Glue to adhere all pieces
  12. Place 2 Clear Faceted Gems in the middle of the daisies
  13. Add a double-bow made from Linen Thread to the top right of your floral arrangement, a Mini Glue Dot is the best for adhering a bow like this.  I left the tails of my bow long, you can trim them if desired


If you purchase $150 or more, take advantage of the Hostess Rewards for yourself!  If you purchase less, please use this Hostess Code: RDFBQXNE. I will pick a random customer at the end of the month from all orders that use this code to receive the Hostess Rewards - it could be you!!


Thursday, March 5, 2020

Come Sail Away Memories & More

Stampin' Up has several different themes of Memories & More Card Packs.  These cards make amazing journaling surfaces for scrapbooks!  They can also be used to make fairly quick-and-easy cards, like the one below.  It may look pretty intricate, but in reality is was pretty simple!


Here's what I did:.

  1. The Memories & More cards are larger than the standard 5.5" x 4.25" cards that you've seen me make.  For this card, I started with a base of Balmy Blue cut to 8.5" x 6.5", scored at 4.25" on the long side and folded/burnished on the score line with my bone folder
  2. Next I cut a Crumb Cake mat to 6.25" x 4.25" and adhered it to the Balmy Blue base
  3. I then took a 6" x 4" piece of Balmy Blue and embossed it with the High Seas 3D Embossing Folder before adhering the laser-cut light house panel from the Come Sail Away Memories & More Card Pack to the embossed piece of Balmy Blue cardstock
  4. I then adhered the laser-cut light house with the Balmy Blue background to the Crumb Cake mat on the card.
  5. There are sticker sheets in the Come Sail Away Memories & More Card Pack - I chose the Very Vanilla label with the Night of Navy border and stamped a sentiment from the High Tide stamp set in Night of Navy - it fit beautifully!
  6. After stamping, I removed the sticker from the sticker sheet and placed it face down on my craft mat.  I placed 5 Mini Stampin' Dimensionals on the sticky-surface, one in each corner and another in the middle.  Then I took a paint brush dipped in baby powder and applied powder to the remaining exposed sticker - I did this because I didn't want the sticker to get smooshed and have an area of it stuck to the card when my desire was for the whole thing to be elevated.
  7. Next I took the circle sticker with "seaweed" coming from two sides and placed it directly yo my card front on a slight angle.  I removed the backing from my Mini Stampin' Dimensionals and placed my sentiment on top of the circle, leaving only the seaweed visible.
  8. I felt that I still needed some additional interest with the sentiment, so I took some Linen Thread and made a few loops.  I secured them with a knot and added a Mini Glue Dot at the knot, then used my tweezers to push the knot and glue dot behind the sentiment.  I just love how those loops turned out!
  9. As a last step, I added 5 Rhinestone Basic Jewels - one as the dot on the "i" in my sentiment and 4 more in the light beams of the lighthouse.

Today's Featured Colors

If you purchase $150 or more, take advantage of the Hostess Rewards for yourself!  If you purchase less, please use this Hostess Code: RDFBQXNE. I will pick a random customer at the end of the month from all orders that use this code to receive the Hostess Rewards - it could be you!!